
La Crosse Technology atomic clocks offer precise timekeeping, automatically synchronizing to the atomic clock signal for accuracy. Explore features like temperature monitoring and customizable displays, enhancing your daily life with reliable information.
What is Atomic Time?
Atomic time is a highly precise standard of timekeeping based on the oscillations of cesium atoms. These oscillations are remarkably stable, providing an incredibly accurate time source. The National Institute of Standards and Technology (NIST) maintains this atomic clock, broadcasting a time signal via radio waves.
La Crosse Technology atomic clocks receive this signal, automatically setting and adjusting the time, eliminating the need for manual adjustments. This ensures exceptional accuracy, far surpassing traditional quartz clocks. The signal is continuously transmitted, allowing your clock to stay synchronized, offering reliable timekeeping.
Benefits of an Atomic Clock
Atomic clocks deliver unparalleled accuracy, automatically synchronizing with the NIST atomic clock signal, eliminating manual setting and drift. This precision is ideal for schedules, appointments, and time-sensitive tasks. La Crosse Technology atomic clocks also often include features like indoor/outdoor temperature monitoring, enhancing functionality.
Furthermore, they offer convenience – no more daylight saving time adjustments! Many models boast stylish designs, seamlessly integrating into any décor. Enjoy peace of mind knowing your clock displays the correct time, consistently and reliably, providing a valuable addition to your home.

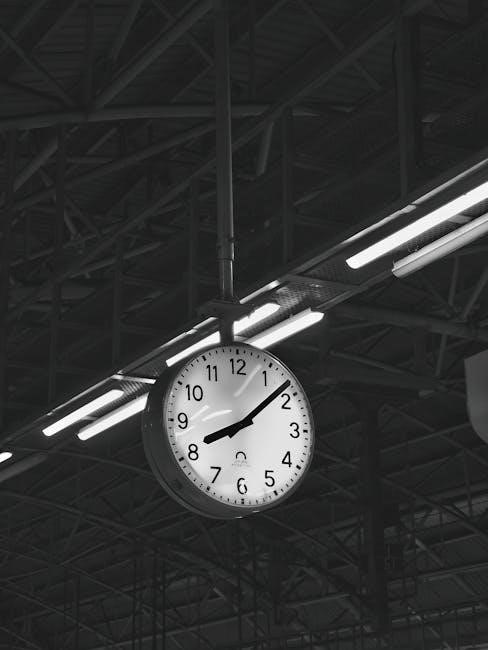
Understanding Your La Crosse Atomic Clock Model (BBB86088v2)
Model BBB86088v2 is an atomic digital wall clock featuring indoor/outdoor temperature readings and customizable display options for convenient, accurate timekeeping.
Package Contents
Upon opening your La Crosse Technology BBB86088v2 package, ensure all components are present. You should find the atomic digital wall clock itself, designed for easy mounting. A wireless outdoor temperature sensor is included, enabling remote temperature monitoring. The package also contains this detailed instruction manual, providing step-by-step guidance for setup and operation. Verify the presence of all items to guarantee a smooth and successful user experience. Missing components? Contact La Crosse Technology support immediately for assistance and replacements, ensuring your clock functions optimally from the start.
Clock Components Overview
The La Crosse Technology atomic clock features a clear, easy-to-read display showcasing time, date, and temperature. Buttons on the clock’s back control settings like time synchronization, display mode, and alarm functions. The outdoor sensor transmits temperature data wirelessly. A battery compartment houses the required batteries for both the clock and sensor. Familiarize yourself with these components – the display, buttons, sensor, and battery locations – to navigate setup and customization effectively. Understanding each part ensures optimal performance and a user-friendly experience with your new atomic clock.
Initial Setup and Synchronization
Begin by installing batteries and allowing the clock to automatically synchronize with the atomic time signal for accurate, self-setting time and date.
Installing Batteries
To begin, locate the battery compartment on the back of your La Crosse Technology atomic clock. Typically, this requires gently sliding off a cover. Insert fresh batteries, paying close attention to the polarity markings (+ and -) indicated inside the compartment. Ensure the batteries are securely seated to establish a proper connection. For optimal performance, use high-quality alkaline batteries.
The outdoor sensor also requires batteries; install them similarly, following the polarity guidelines. Proper battery installation is crucial for initial synchronization and ongoing operation of both the clock and its temperature sensing capabilities.
Receiving the Atomic Time Signal
After installing batteries, your clock will automatically begin searching for the atomic time signal. This process may take several minutes, even up to 24 hours, depending on your location and signal strength. During this time, the atomic signal icon may flash. Ensure the clock is not near sources of interference, like electronic devices.
For best results, position the clock near a window facing Fort Collins, Colorado, the source of the WWVB signal. Successful synchronization is indicated by a steady atomic signal icon, confirming accurate timekeeping.
Troubleshooting Synchronization Issues
If your clock fails to synchronize, first ensure it’s within range of the WWVB signal (typically within a few hundred miles of Fort Collins, Colorado). Try relocating the clock to a different location, preferably near a window. Interference from electronics can also hinder synchronization; move the clock away from such devices.
A weak signal may cause intermittent synchronization. Consider a manual time setting as a temporary solution. If problems persist, check battery levels, as low power can affect signal reception. Resetting the clock might also initiate a fresh search.
Setting the Clock Manually
Manual time setting is available if atomic signal reception is unavailable. Use the ‘SET’ button to cycle through hour, minute, date, year, and confirm each selection carefully.
Manual Time Setting Procedure
To set the time manually, press and hold the ‘SET’ button until the hour display flashes. Use the ‘UP’ or ‘DOWN’ buttons to adjust the hour to your desired setting. Press ‘SET’ again to move to minute setting; adjust with ‘UP’ or ‘DOWN’. Repeat this process for the date, month, and year.
Confirm each selection by pressing ‘SET’ to advance to the next field. Ensure accuracy, as manual settings override automatic synchronization. Remember to double-check the date and time after completing the procedure for optimal performance.
Setting the Date
After setting the hour and minutes, pressing the ‘SET’ button again will initiate date adjustment. The month display will begin to flash, prompting you to use the ‘UP’ or ‘DOWN’ buttons to select the correct month. Once the desired month is displayed, press ‘SET’ again to move onto day selection.
Utilize the ‘UP’ and ‘DOWN’ buttons to accurately set the day of the month. Confirm your selection with another press of the ‘SET’ button, proceeding to the year setting. Double-check the date for accuracy.
Setting the Year
Following date selection, pressing the ‘SET’ button will activate the year adjustment mode. The year display will flash, indicating it’s ready for modification. Employ the ‘UP’ and ‘DOWN’ buttons to increment or decrement the year until the correct year is displayed on the clock’s screen.
Carefully verify the displayed year before finalizing your settings. Once the accurate year is shown, press the ‘SET’ button one final time to confirm and save the year. This completes the manual time and date configuration process.

Display Options and Customization
Personalize your clock with selectable display modes (12/24 hour), date formats, and weekday views—full or abbreviated—to suit your preferences.
Choosing Display Modes (12/24 Hour)
La Crosse Technology atomic clocks provide the flexibility to display time in either the 12-hour or 24-hour format. To switch between these modes, typically you’ll need to access the clock’s settings menu by pressing and holding the ‘SET’ button.
Once in the settings, navigate to the time display option. Cycle through the available choices using the ‘SET’ button until your preferred format—12-hour with AM/PM indicators or 24-hour (military time)—is selected. Confirm your choice by pressing the ‘SET’ button again to save the setting and return to the main clock display. This customization ensures the time is presented in a way that best suits your viewing preference.
Selecting Date Format
La Crosse Technology atomic clocks often allow you to personalize the date display format. Access the clock’s settings menu, usually by pressing and holding the ‘SET’ button, to begin customization. Navigate through the options until you reach the date format setting.
Common choices include MM/DD/YYYY, DD/MM/YYYY, or YYYY/MM/DD. Use the ‘SET’ button to cycle through these formats until your preferred style appears on the display. Confirm your selection by pressing ‘SET’ again, saving the change and returning to the main clock view. This ensures the date is presented in a familiar and easily readable manner.
Weekday Display Options (Full vs. Abbreviated)
La Crosse Technology clocks provide flexibility in how weekdays are shown. Within the clock’s settings, accessible via the ‘SET’ button, locate the weekday display option. You’ll typically find a choice between displaying the full weekday name – like “Monday” – or an abbreviated version, such as “Mon.”
Cycle through these options using the ‘SET’ button until your desired format is visible on the screen. Confirm your selection with another press of ‘SET’ to save. This customization allows you to tailor the clock’s display to your preference for readability and aesthetic appeal.

Temperature Monitoring Features
La Crosse Technology atomic clocks often include indoor and outdoor temperature readings, utilizing a remote sensor for external data and providing comfort insights.
Indoor Temperature Display
La Crosse Technology atomic clocks prominently feature an indoor temperature display, providing a convenient and constant reading of the ambient temperature within your home. This built-in sensor accurately measures the surrounding air temperature, offering valuable comfort information at a glance. The display typically shows the temperature in either Fahrenheit or Celsius, selectable through the clock’s settings.
Regularly monitoring the indoor temperature helps maintain a comfortable living environment and can assist in optimizing heating and cooling systems for energy efficiency. The indoor temperature reading is a core function, ensuring you’re always aware of the climate inside your space.
Outdoor Temperature Display (with Sensor)
La Crosse Technology atomic clocks, when paired with an optional outdoor sensor, provide remote temperature monitoring. This feature displays the temperature outside your home directly on the clock’s screen, offering valuable weather information without stepping outdoors. The sensor transmits data wirelessly, ensuring a convenient and real-time temperature reading.
Proper sensor placement is crucial for accurate readings – shaded locations are recommended. The outdoor temperature display enhances the clock’s functionality, allowing you to plan activities and adjust your home’s climate control effectively.
Temperature Units (Fahrenheit/Celsius)
La Crosse Technology atomic clocks offer the flexibility to display temperatures in either Fahrenheit (°F) or Celsius (°C). This customization allows users to view temperature readings in their preferred unit of measurement. Switching between units is typically done through a settings menu accessible via the clock’s buttons.
The ability to choose your preferred temperature scale ensures comfortable and convenient monitoring of both indoor and outdoor temperatures. Refer to your model’s instruction manual for specific steps on changing the temperature unit display.

Outdoor Sensor Placement and Considerations
Optimal sensor location is crucial for accurate readings; place it in a shaded area, protected from direct sunlight and precipitation, ensuring reliable data.
Optimal Sensor Location
For the most accurate outdoor temperature readings, carefully consider the placement of your La Crosse Technology sensor. Avoid areas with direct sunlight, as this can artificially inflate temperature measurements. Similarly, steer clear of locations near heat-generating sources like vents, chimneys, or paved surfaces.
A shaded spot, ideally under the eaves of a building or beneath a tree’s canopy, provides a more representative ambient temperature. Ensure good airflow around the sensor, avoiding enclosed spaces. Proper placement minimizes interference and delivers reliable, consistent data for your weather monitoring system.
Protecting the Sensor from the Elements
Your La Crosse Technology outdoor sensor is designed for durability, but protecting it from harsh weather extends its lifespan and ensures accurate readings. While the sensor is splash-proof, prolonged exposure to heavy rain, snow, or ice can cause damage. Consider a sensor shield to deflect direct precipitation and reduce build-up.
Avoid mounting the sensor where it will be directly impacted by strong winds or flying debris. Regular inspection for accumulated snow or leaves is also recommended to maintain optimal performance and prevent inaccurate temperature data.
Sensor Range and Interference
The La Crosse Technology sensor typically boasts a range of up to 330 feet in open air, but this can be significantly reduced by obstructions. Walls, metal structures, and even dense foliage can interfere with the wireless signal. Electronic devices like routers and microwaves can also cause interference, impacting data transmission.
To maximize range, position the clock and sensor as directly as possible, minimizing obstacles. Experiment with different locations to find the strongest, most reliable connection for accurate temperature readings.

Advanced Features and Settings
Explore options like disabling the atomic signal for manual operation, utilizing the low battery indicator, and performing a complete clock reset for optimal performance.
Atomic Signal OFF Mode
Selecting Atomic OFF mode disables the clock’s automatic synchronization with the NIST atomic clock radio signal. This is useful if you’re in an area with a weak signal or prefer to set and maintain the time manually. When this mode is activated, the clock will no longer attempt to receive the time signal, and you’ll need to proceed with the manual time setting procedure.
After choosing “OFF”, the next step in the setup process will automatically direct you to the hour setting, allowing you to immediately begin configuring the time independently. Remember to periodically check and adjust the time to maintain accuracy when operating in this mode.
Low Battery Indicator
The La Crosse Technology clock features a low battery indicator to alert you when the batteries are running low in either the main clock unit or the outdoor temperature sensor. A flashing low battery icon on the display signals it’s time for replacement. Prompt battery changes ensure continuous and accurate timekeeping, as well as reliable temperature readings.
Don’t ignore this warning! Failing to replace batteries can lead to inaccurate readings or complete clock malfunction; Use fresh, high-quality batteries for optimal performance and longevity of your atomic clock system.
Resetting the Clock
If your La Crosse Technology atomic clock experiences unusual behavior or fails to synchronize, resetting it can often resolve the issue. Locate the reset button – typically a small recessed button on the clock’s back. Use a small tool, like a paperclip, to gently press and hold the reset button for a few seconds.
This will return the clock to its factory default settings, requiring you to re-initiate the synchronization process. Remember to reinstall batteries after a reset for optimal functionality and accurate timekeeping.

La Crosse Technology Support Resources
Access comprehensive support through online manuals, FAQs, and dedicated weather station assistance. Direct customer support is also available for personalized help with your clock.
Online Manuals and FAQs
La Crosse Technology provides a wealth of self-help resources on their official website. You can easily find your specific clock model – like the BBB86088v2 – and download the complete instruction manual in PDF format. This manual details every feature, from initial setup and synchronization to advanced settings and troubleshooting.
Beyond the manuals, a frequently asked questions (FAQ) section addresses common issues and provides quick solutions. These resources cover topics like signal reception problems, incorrect time displays, and sensor connectivity. Utilizing these online tools can often resolve issues quickly and efficiently, saving you time and effort.
Weather Station Support
La Crosse Technology excels in weather monitoring solutions, and their support extends beyond basic atomic clock functions. If your clock is part of a larger weather station system, dedicated support resources are available. These resources cover sensor integration, data interpretation, and troubleshooting connectivity issues between the clock and other weather station components.
The website offers specific guides for bundling registration and accessing features within the La Crosse View App, enhancing your overall weather monitoring experience. Detailed information assists in maximizing the functionality of your integrated system.
Contacting Customer Support
For personalized assistance with your La Crosse Technology atomic clock, direct customer support is readily available. While online manuals and FAQs address common concerns, complex issues may require speaking with a representative. La Crosse Technology provides multiple avenues for contact, ensuring convenient access to expert help.
Visit their official website to locate contact forms, email addresses, and potentially phone numbers for dedicated support teams. Prompt and helpful assistance is a priority, guaranteeing a positive user experience.
Expanding Your System
Enhance your setup with add-on sensors for comprehensive monitoring, or explore subscription plans for advanced features and data access through the La Crosse View App.
Add-On Sensors
Expand the capabilities of your La Crosse Technology atomic clock system by incorporating additional sensors. These sensors allow for monitoring of various environmental factors beyond basic temperature. Options include sensors for rainfall, wind speed, humidity, and even soil moisture, providing a comprehensive weather station experience.
Adding sensors requires ensuring compatibility with your existing clock model (BBB86088v2). The clock can typically support multiple sensors, allowing you to create a network for detailed data collection. Proper placement of these sensors is crucial for accurate readings, considering factors like sunlight exposure and obstructions.
Subscription Plans
La Crosse Technology offers subscription plans to enhance your weather station experience and data access. These plans often include extended forecast data, historical weather information, and cloud storage for your sensor readings. Subscriptions can provide access to detailed analysis tools and customizable alerts based on your specific monitoring needs.
Consider a plan if you desire remote access to your weather data via the La Crosse View App, or if you require long-term data archiving. Evaluate the features of each plan to determine which best suits your monitoring requirements and budget.

Troubleshooting Common Issues
Common problems include signal reception difficulties, incorrect time displays, and inaccurate temperature readings. Refer to the manual for solutions and ensure proper sensor placement.
Clock Not Receiving Signal
If your La Crosse Technology atomic clock isn’t receiving a signal, several factors could be at play. First, ensure the clock isn’t near sources of interference like computers or other electronic devices. Try relocating it to a different spot, preferably near a window.
Also, confirm the outdoor sensor is properly connected and functioning if applicable. A weak battery in either the clock or sensor can hinder signal reception. Finally, remember that atomic signal reception can be affected by weather conditions or geographical location; patience is key during initial setup or after a move.
Incorrect Time Display
An incorrect time display on your La Crosse Technology atomic clock usually indicates a synchronization issue. First, allow the clock ample time to receive the atomic signal – this can take several hours, especially after initial setup or a relocation. If the problem persists, attempt a manual time setting as a temporary solution.
Verify the correct time zone is selected within the clock’s settings. A weak atomic signal or interference can also cause inaccuracies. If manual setting doesn’t resolve it, consider resetting the clock to factory defaults and re-attempting synchronization.
Temperature Readings Inaccurate
Inaccurate temperature readings often stem from improper outdoor sensor placement. Ensure the sensor isn’t exposed to direct sunlight, precipitation, or heat-generating sources like vents. Verify the sensor is within range of the clock; excessive distance or obstructions can interfere with the signal.
Confirm the correct temperature unit (Fahrenheit or Celsius) is selected in the clock’s settings. Low batteries in either the clock or the sensor can also cause inaccurate readings. Replace batteries and re-sync the sensor with the clock to restore accuracy.

Maintaining Your La Crosse Atomic Clock
Regular cleaning with a soft cloth and timely battery replacements ensure optimal performance and longevity of your La Crosse Technology atomic clock and its sensor.
Cleaning the Clock and Sensor
To maintain the appearance and functionality of your La Crosse Technology atomic clock and outdoor sensor, regular cleaning is recommended. Use a soft, dry cloth to gently wipe the clock’s display and casing. Avoid abrasive cleaners or harsh chemicals, as these can damage the surface. For the outdoor sensor, periodically check for debris accumulation, such as leaves or dirt.
Carefully remove any obstructions with a soft brush or cloth. Do not submerge the sensor in water or use excessive moisture during cleaning. Ensure both the clock and sensor are completely dry before restoring power or re-mounting. Consistent, gentle cleaning will help preserve the accuracy and lifespan of your weather station components.
Battery Replacement Guidelines
To ensure continuous operation of your La Crosse Technology atomic clock, timely battery replacement is crucial. A low battery indicator will alert you when batteries are nearing depletion. Use only fresh, high-quality batteries of the correct type as specified in the manual – typically AA or AAA. Replace all batteries in the clock and outdoor sensor simultaneously to prevent inconsistencies.
Always dispose of used batteries responsibly, following local regulations. Avoid mixing old and new batteries, or different battery types. Proper battery maintenance guarantees accurate timekeeping and reliable temperature readings from your weather station.