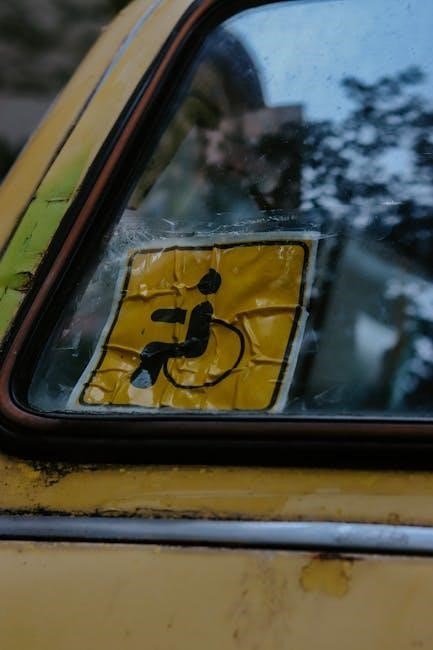
Car Decal Instructions: A Comprehensive Guide
Applying car decals is a fantastic way to personalize your vehicle and showcase your style. This comprehensive guide offers step-by-step instructions, ensuring a successful application for a fantastic looking car. We cover everything from preparation and best practices to troubleshooting for any issues.
Car decals are a popular way to add personality and flair to your vehicle. They range from simple vinyl stickers to intricate graphics, allowing for endless customization. These decals can be used to express your interests, promote your business, or simply add a unique touch to your ride. Understanding the different types of decals and their intended uses is crucial for a successful application.
Vinyl decals are commonly used due to their durability and versatility. They can withstand various weather conditions and adhere well to most smooth surfaces. Before diving into the application process, it’s essential to consider factors such as the decal’s size, the surface material, and the desired placement. Proper preparation and technique are key to achieving a professional-looking result that will last for years. By following this comprehensive guide, you’ll be well-equipped to apply car decals like a pro, transforming your vehicle into a reflection of your individuality. Remember a smooth decal is a happy decal!

Essential Tools and Materials for Decal Application
Before embarking on your car decal application, gathering the right tools and materials is crucial for a smooth and professional outcome. Essential items include a squeegee or credit card for applying pressure, masking tape for positioning the decal, and a clean microfiber cloth for surface preparation. Rubbing alcohol or soap and water is necessary to thoroughly clean the application area, removing any dirt, grease, or residue that could hinder adhesion. A precision knife or blade can be useful for trimming excess vinyl or creating intricate designs.
For larger decals, consider using a spray bottle filled with a mixture of water and a few drops of mild dish soap to aid in repositioning and prevent air bubbles. A heat gun or hairdryer can assist in conforming the decal to curved surfaces and ensuring a strong bond. Additionally, having a well-lit work area is essential for precision and accuracy. Remember to always prioritize safety and use caution when handling sharp tools or heat sources. With the right tools and materials at your disposal, you’ll be well-prepared to tackle your car decal application with confidence.
Surface Preparation: Cleaning and Drying
Proper surface preparation is paramount for successful car decal application. Begin by thoroughly cleaning the area where the decal will be applied. Use rubbing alcohol or soap and water to remove any dirt, grease, wax, or residue. Avoid using glass cleaners, as they can leave behind a film that hinders adhesion. For stubborn contaminants, consider using a specialized automotive cleaner.
Once cleaned, rinse the area with clean water and dry it completely with a clean microfiber cloth. Ensure no moisture remains, as this can interfere with the decal’s adhesive. If necessary, use a heat gun or hairdryer to expedite the drying process, especially in humid conditions. Inspect the surface for any imperfections, such as scratches or dents, that could affect the decal’s appearance. Address any issues before proceeding. Remember, a clean, dry, and smooth surface is essential for optimal decal adhesion and a professional-looking result. Taking the time to prepare the surface properly will significantly improve the longevity and appearance of your car decal.
Decal Positioning and Securing with Tape
Accurate decal positioning is crucial for achieving the desired aesthetic on your vehicle. Before removing the decal’s backing, carefully position it on the prepared surface to visualize the final placement. Take your time and step back occasionally to assess the overall look from different angles. Once you’re satisfied with the position, use masking tape to secure the decal in place.
For larger decals, employ the “hinge method.” Apply a strip of masking tape along the top edge of the decal, creating a hinge. This allows you to lift the decal while keeping it aligned. For smaller decals, you can use multiple pieces of tape to secure all corners and edges. Double-check the positioning before proceeding to the next step, as adjustments become more difficult once the backing is removed. Ensure the tape is firmly adhered to the car’s surface to prevent the decal from shifting during application. Precise positioning and secure taping are essential for a professional and visually appealing decal installation.
Dry Application Method: Step-by-Step Instructions
The dry application method is suitable for smaller decals and those with simpler designs. Begin by ensuring your surface is clean and dry. With the decal taped in position using the hinge method, carefully peel back half of the decal’s backing, exposing the adhesive side. Use scissors or a sharp blade to cut away the removed backing, ensuring a clean edge.
Using a squeegee or a credit card wrapped in a soft cloth, gently apply the exposed portion of the decal to the surface, working from the center outwards. Apply even pressure to avoid trapping air bubbles. Once the first half is adhered, slowly peel away the remaining backing, continuing to squeegee the decal as you go. If bubbles appear, use a pin to create a tiny hole and gently press out the air. After the entire decal is applied, firmly squeegee the surface again to ensure proper adhesion. Finally, carefully peel off the transfer tape at a shallow angle, leaving the decal behind.

Wet Application Method: Advantages and Steps

The wet application method is ideal for larger decals or those with intricate designs, providing more flexibility and reducing the risk of air bubbles. After cleaning the surface, prepare a slip solution by mixing a few drops of mild dish soap with water in a spray bottle. Position the decal and secure it with tape, then peel off the backing completely. Generously spray the adhesive side of the decal and the application surface with the slip solution.
Carefully apply the decal to the surface, allowing the slip solution to help you reposition it as needed. Once the decal is in the desired position, use a squeegee to gently press out the excess solution, working from the center outwards. Start with light pressure and gradually increase it to ensure good adhesion. After removing most of the solution, let the decal dry for at least 30 minutes. Finally, carefully peel off the transfer tape at a shallow angle. If any edges lift, gently press them down with your finger or a soft cloth. Allow the decal to fully cure for 24-48 hours before washing the vehicle.

Troubleshooting: Bubbles, Wrinkles and Lifting
Despite careful application, bubbles, wrinkles, or lifting edges can sometimes occur. Addressing these issues promptly ensures a professional-looking finish. For small bubbles, use a pin or needle to gently puncture the bubble, then smooth the vinyl down with your finger or a squeegee. For larger bubbles, make a small slit with a sharp blade and carefully press the air out. Wrinkles can be more challenging, but often can be smoothed out by gently heating the vinyl with a heat gun or hairdryer on a low setting, then using a squeegee to flatten the area.
If the edges of the decal are lifting, it could be due to insufficient cleaning, improper application, or environmental factors. Ensure the surface is thoroughly cleaned before reapplying. If lifting occurs after application, try reheating the area and firmly pressing it down. For persistent lifting, consider using a vinyl adhesive promoter specifically designed for car decals. Apply a small amount to the affected area and then press the decal firmly in place. If the issue persists, consulting a professional installer may be beneficial to avoid further damage.
Post-Application Care and Maintenance
Once your decal is applied, proper care and maintenance are essential for longevity and appearance. Allow the decal to fully cure for at least 24 to 48 hours before washing the vehicle. When washing, avoid using high-pressure washes directly on the decal, as this can cause edges to lift or damage the vinyl. Hand washing is preferable, using a mild soap and a soft sponge or cloth. Avoid abrasive cleaners or harsh chemicals that could degrade the decal’s adhesive or fade the colors. When drying, pat the decal gently instead of rubbing vigorously.
Protect the decal from prolonged exposure to direct sunlight, which can cause fading over time. Parking in shaded areas or using a car cover can help mitigate sun damage. Regularly inspect the decal for any signs of lifting, cracking, or peeling. Addressing minor issues promptly can prevent further damage and extend the life of your decal. With proper care, your car decal can maintain its vibrant appearance and continue to enhance your vehicle for years to come. Consider using a vinyl protectant spray periodically to add an extra layer of defense against the elements.
Decal Removal Techniques and Tips
Removing a car decal requires patience and the right techniques to avoid damaging the vehicle’s paint. Start by warming the decal with a heat gun or hairdryer on a low setting. This softens the adhesive, making it easier to peel away. Hold the heat source a few inches from the decal and move it back and forth to evenly distribute the heat. Once the decal is warm, use a plastic scraper or credit card to gently lift an edge.
Slowly peel the decal away from the surface, maintaining a consistent angle. If the adhesive is stubborn, reapply heat as needed. Avoid pulling too hard, as this can tear the decal and leave residue behind. After removing the decal, use an adhesive remover, such as Goo Gone, to eliminate any remaining sticky residue. Apply the remover, let it sit for a few minutes, and then wipe it away with a clean cloth. Wash and wax the area to restore the paint’s shine and protect it from further damage. For older, more brittle decals, consider seeking professional help to ensure a safe and effective removal process.
